Bugwall Installation instructions and tips
So your new Bug Wall has come in the mail. Well, that means it’s time to learn how to install your RV bug screen, and we’re here to help. To ensure this process goes as smoothly as possible, the first step of any Bug Wall installation is to take a look at this article. While this installation won’t be too difficult, you should still be sure to follow the instructions closely. With our help, this can be a low-stress endeavor! After all, the unofficial first step of this installation is to crack open a drink. Cheers to a bug-free van!
Step 1 - Coozie load
Load your fancy new Bugwall coozie that was included in your package. Toss in your favorite beverage, take a few sips and imagine how much cooler your van is about to be. That cool bug free breeze just brushing along your skin. Your non-bug bitten skin that is. It will be glorious. Now that we are in the right mindset lets move on to step 2.
2- Watch the install video
THE INSTALL VIDEOS ARE OLDER THAN THESE UPDATED INSTRUCTIONS BUT WILL GIVE YOU GOOD VISUALS FOR THE OVERALL PROCESS.
PLEASE FOLLOW THE WRITTEN INSTRUCTIONS AND JUST USE THE VIDEOS AS VISUAL GUIDE TO THE WRITTEN. THESE WRITTEN INSTRUCTIONS CONTAIN UPDATES TO THE VIDEO.
Click on the videos at the bottom of this RV insect screen installation guide. Our instructions are also written out below. Please read through these instructions and watch the videos for the best overall guide to installing your insect screen. If your package came with any additional or supplemental instructions those will be done in addition to these written instructions and video. Currently all of our van screens ship with a roll of double sided tape. This is not featured in the video but be sure to install it as shown below.
3- Positioning
PICTURES FOR THESE STEPS BELOW THIS SECTION! PLEASE SCROLL DOWN AFTER READING
TIME TRAVEL- Lets help our future self out for a few seconds- Take a marker and mark the seal with a mark on your van so you can re-install the seal back to the same place later on in the process. Its a big help if you can install the seal back in the same position left to right. Your future self will be stoked you did this!
-You can remove the seal from across the top of your door opening. You will want to clean the flange with some alcohol or just wipe it down really good with water to get as much of the loos dirt off as possible. This will help the tape stick.
-Next install the double sided tape across the top and around both corners. This is not shown in the current video as it has been added for our V2 screens. An updated video is coming soon. The tape is long enough to start and end just below both corners. The tape ideally will be folded so that the tape is 1/2 on the front of the flange and half on the back of the flange.
-After the tape is on the flange you can pull off the red cover so the exposed side of the tape is now sticky.
-You can now hold up your screen and position it in your doorway. Side sliding door Bugwalls will have a guide like across the top that you can line up with the edge of the flange. This will help with keeping it straight across the top and also sets the height we use here at Bugwall. Once you stick the fabric to the backside it will raise up and will hang to where the bottom of the Bugwall is on the outside of the step/floor. This guide line is a "guideline" in a sense that you can still install higher or depending on your build but this is the height that we commonly use here for installs. You can do this similar to the video but the addition of the tape will help greatly with this step. You can press the screen across the tape and it will hold it pretty good for you.
IMPORTANT- When positioning your screen make sure to check the left and right position AND the length. You will especially want to make sure the left zipper on a sliding door screen will not interfere with the weather seal along the left side. TIP- At the very top it will be out of center to the right- The left edge of the weather seal "bumps out" so you want your screen centered between the bump out shape and the right edge of the door. If you center it at the very top of the opening it may interfere with that bump out.
LENGTH TIP- Side screens will have a guide line to line up with the edge of the upper flange. It will look long until its wrapped up the backside and clips are installed. This line will set the length to hang in front of the step/floor. If you wish for your Bugwall to be scrapping or just above the floor you will need to raise it higher than this line. We like when it hits the front of the step like this line sets it. This uses the step/floor as a backstop when closing behind you. On older Bugwalls that do not have a line or some rare models that do not have a line you will want to hang the screen from the tape so that it is about an inch too long. Then when you wrap the fabric up the backside of the flange, install the clips and eventually re-install the weather seal it will end up raising up about an inch from its initial height when just hanging from the tape.
Rear screens do not have a line but the latch holes, slots or cuts depending on van model will set your height when lining those up with the latches on the rear doors.
Once your side to side and length are close to position you can move onto step 3 clip install- PLEASE NOTE- SPRINTER REAR SCREENS COME WITH ADDITIONAL INSTRUCTIONS REGARDING CLIP INSTALL. DO NOT INSTALL CLIPS ACROSS THE TOP OF SPRINTER REAR SCREENS. ONLY TAPE. ALL OTHER DOORS FOLLOW BELOW.
BELOW ARE SOME PICTURES FROM THIS SECTION
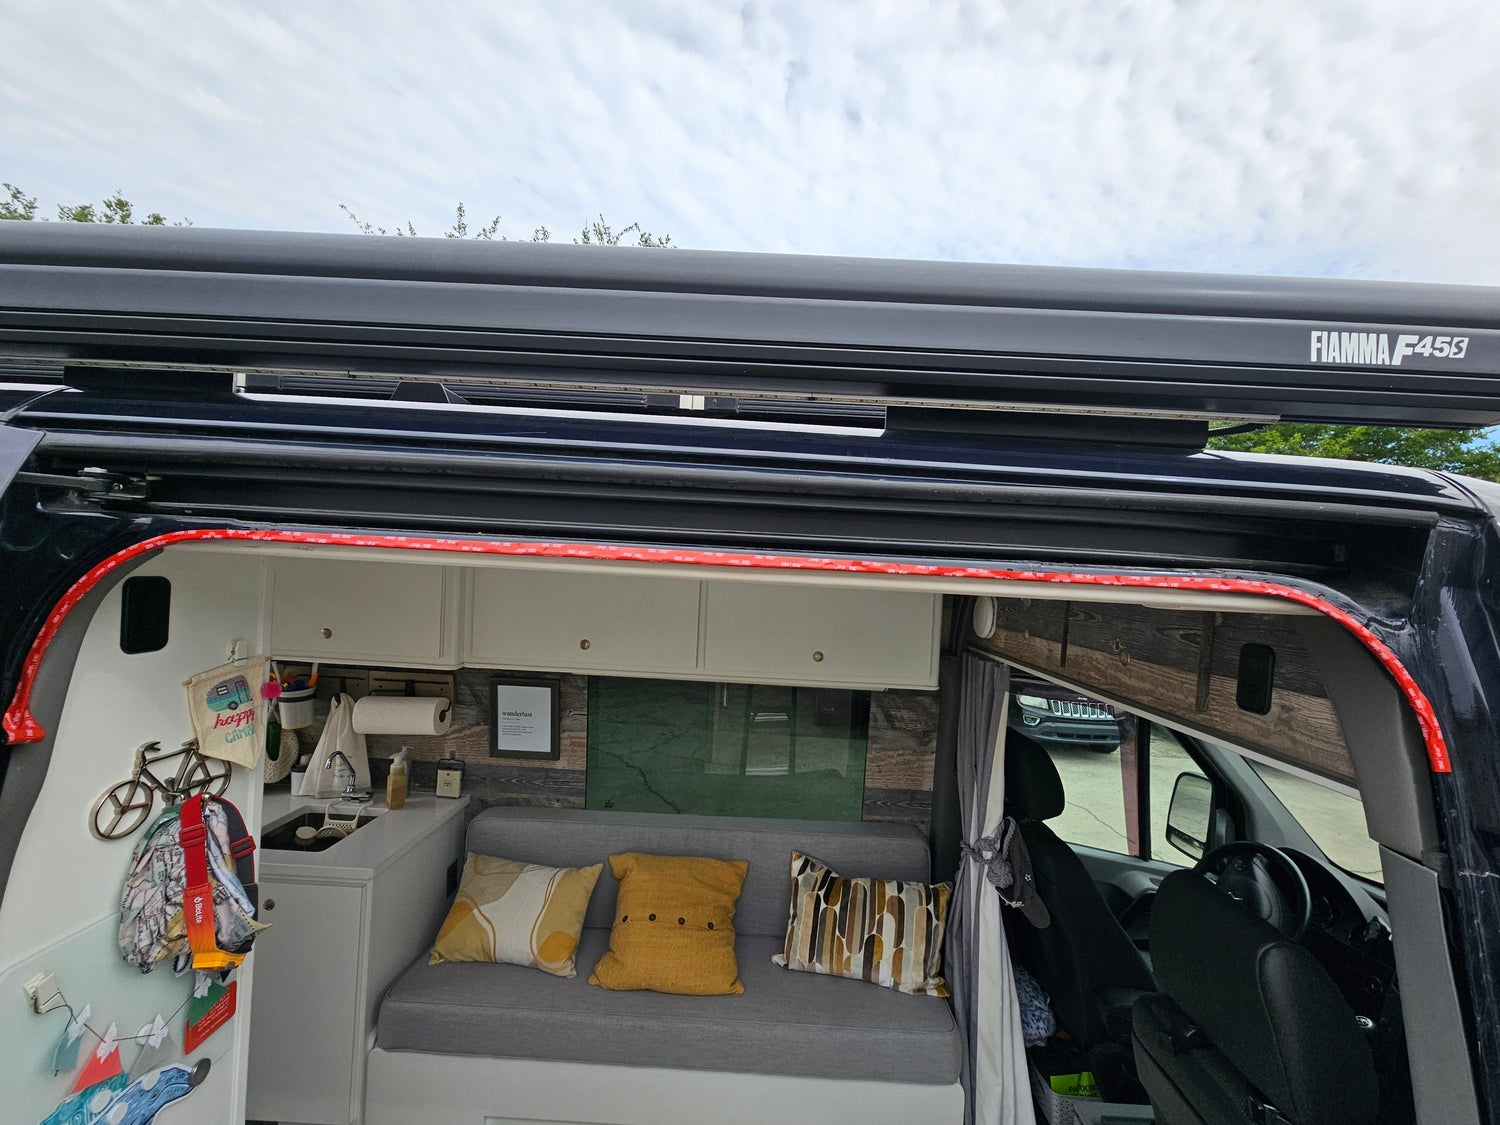
Install double sided tape across top of opening. This is used on ALL door openings side and rear. Install the tape so half is on each side of the flange.

Bugwalls will have a white pencil line as a guide line on side sliding door screens. You can use this line to help install straight across the top. We like to position the line even with the bottom of the metal flange that you just wrapped with tape. This will set the height of the Bugwall to just hang past the floor/step. You should not set it any lower than this. You may choose to raise the screen up higher. This line is a "guideline" for the height we tend to use here the most.

You can use the tape to position the black fabric around the corners. Make sure to stick the backside first so it can wrap around the flange. You should be able to stick your fingers around the backside of the flange like shown. The tape will hold the fabric. Then once its all stuck to the tape on the front and backside you can start to install the clips. If it is too tight and you cannot get your fingers up behind the flange as shown it will be hard to reinstall the seal.
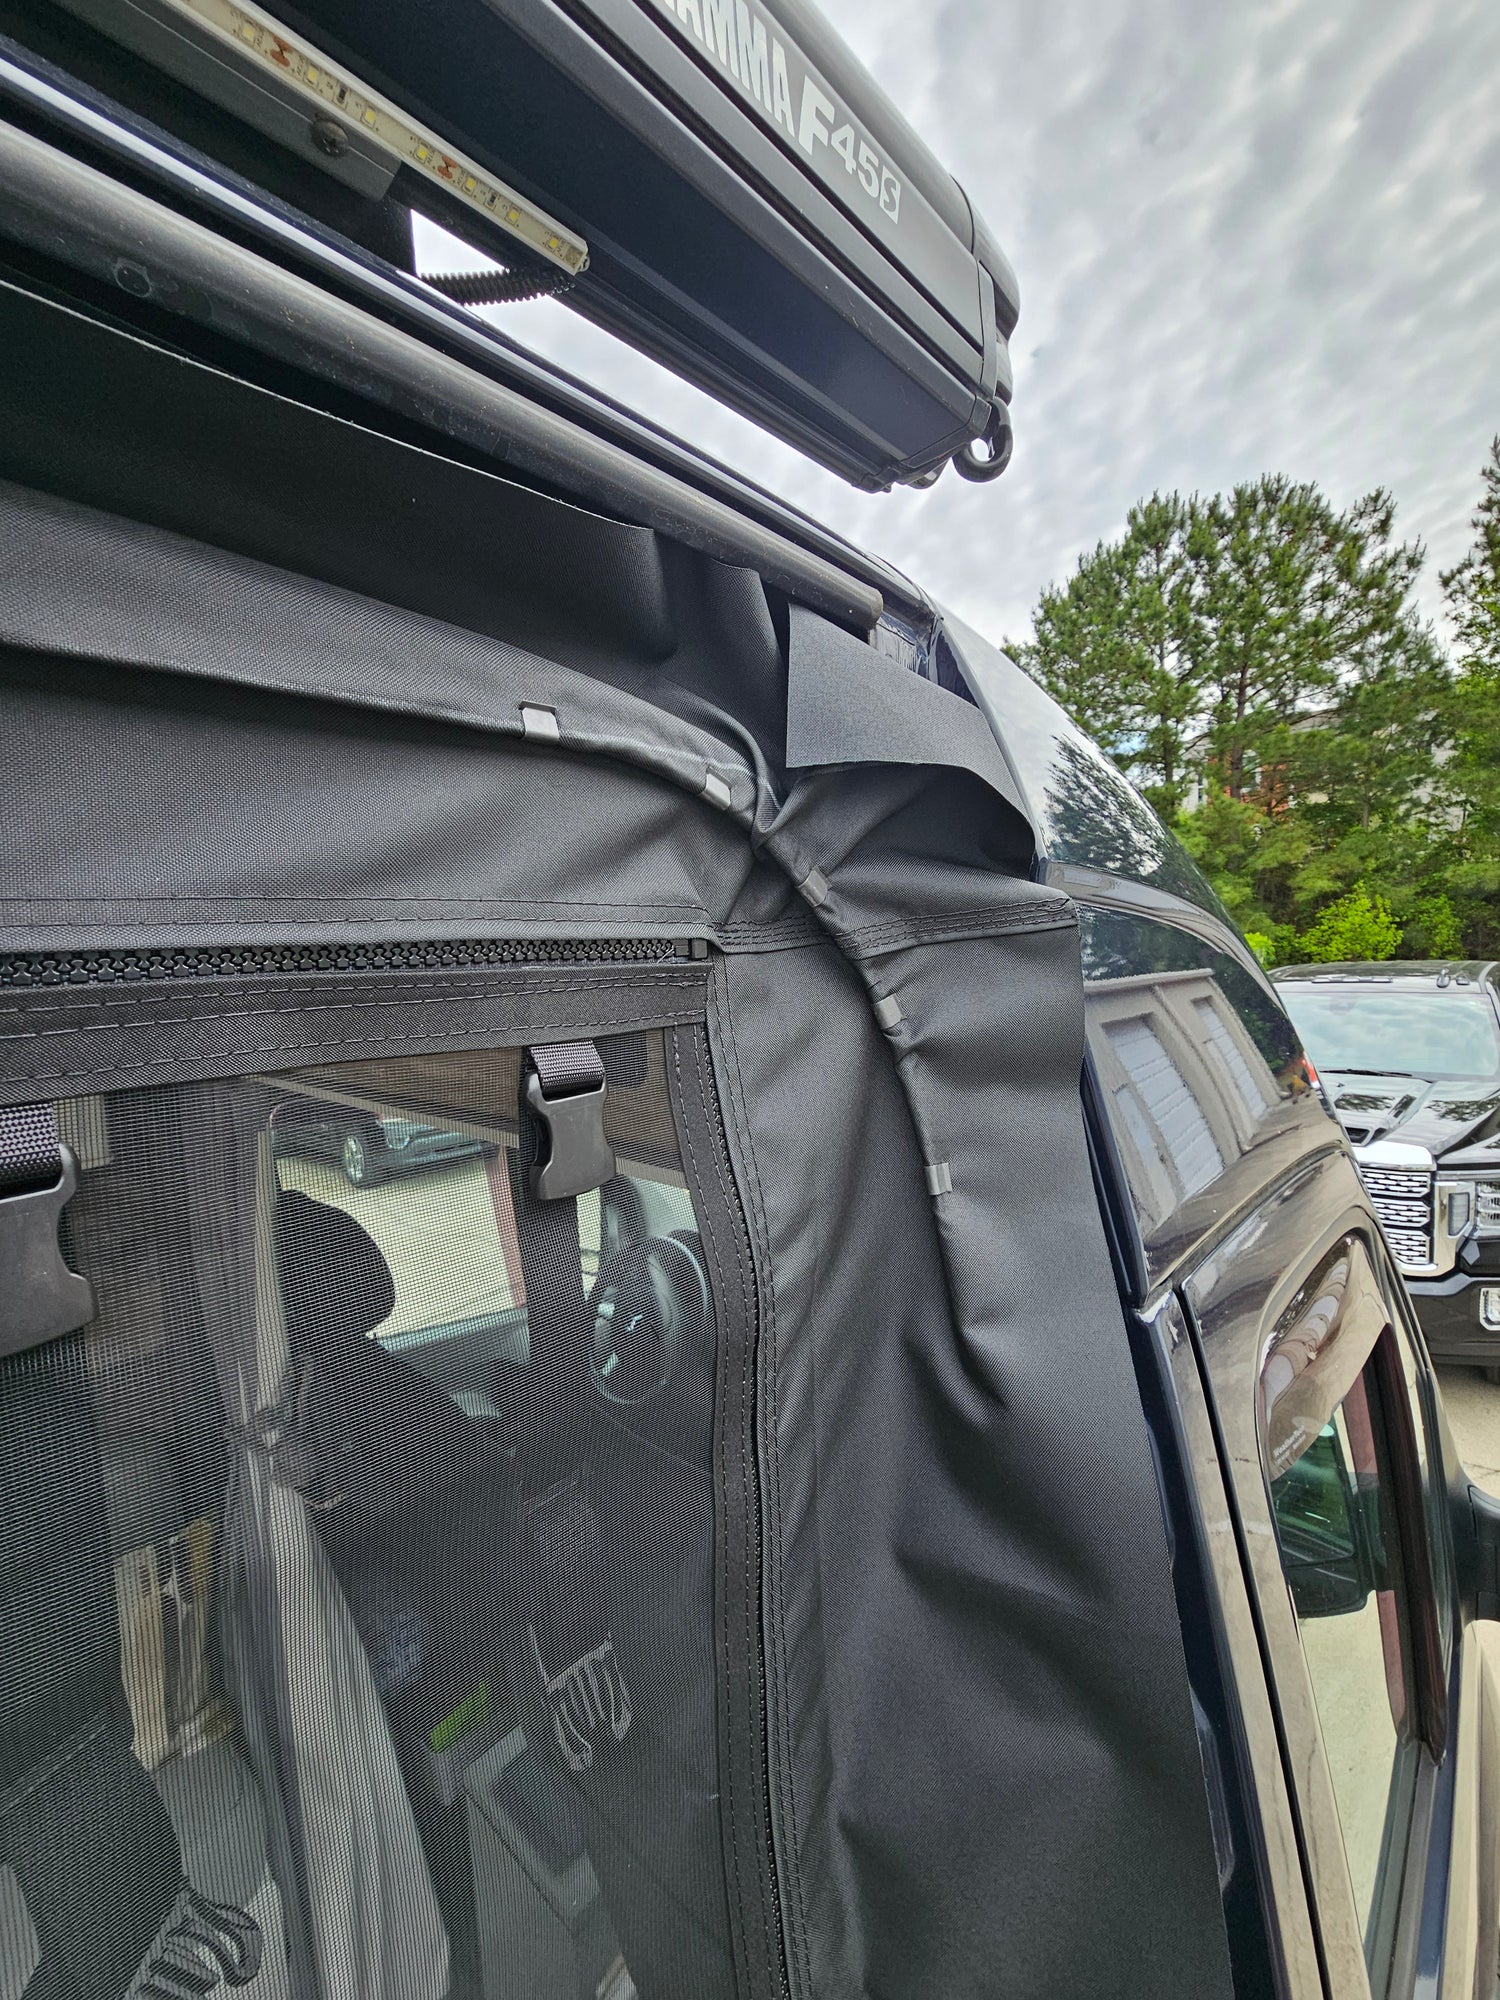
You can add clips around the corners once everything is in position using the tape. Please read BELOW for the clip install process. We recommend a small hammer or mallet to help you out.
4- TOP Clips install
The position of your bug screen looks good side to side and length now let us move forward.
You will be using the "thick" clips that came with your screen across the top. They will pinch over the fabric and the tape.
SPRINTER REAR SCREENS ONLY- Do not use clips on Sprinter rear screens across the top. The tape and seal will hold the screen you will have additional tips for this in your package. All other screens install as below. PLEASE SEE BELOW THIS SECTION FOR SPRINTER REAR PICTURES.
IMPORTANT- We are only going to install a few and then check the length- These are difficult to remove once installed so lets not go crazy til we check the length. You can use a small hammer or mallet to install the clips.
Install one in the center and one towards each side- Your screen should still be slightly long at this point- The weather seal and working down the sides will still lift the screen about another 1/4" or so.
If your length looks good you can install a clip about every 6-8" across the top.
THE CORNERS- These can be a little tricky but we will get ya through it. This is usually a good stopping point- take a sip from that coozie, admire how far we have come.
CORNER TIPS-
Tip 1- Make some room- You will want to use your fingers and push the black material up behind the corners. Shortly we are going to be re-installing the weather seal and if the fabric is too taunt the seal will not push back on up into the corners fully. We will want to get that seal fully up into the corners so we need to make some room. Get that fabric wrapped around the flange with room on the backside.
Tip 2- Install a clip just below the corner and right in the turn- The metal, tape and fabric make for a thick area here. You may need to use a small hammer to tap the clips in this area.
LENGTH CHECK- Now that we are across the top and around the coners check your length. You should be fairly close to your finished height. Maybe a touch long at this point is ok as when you go down the side you can adjust to hit it right on.
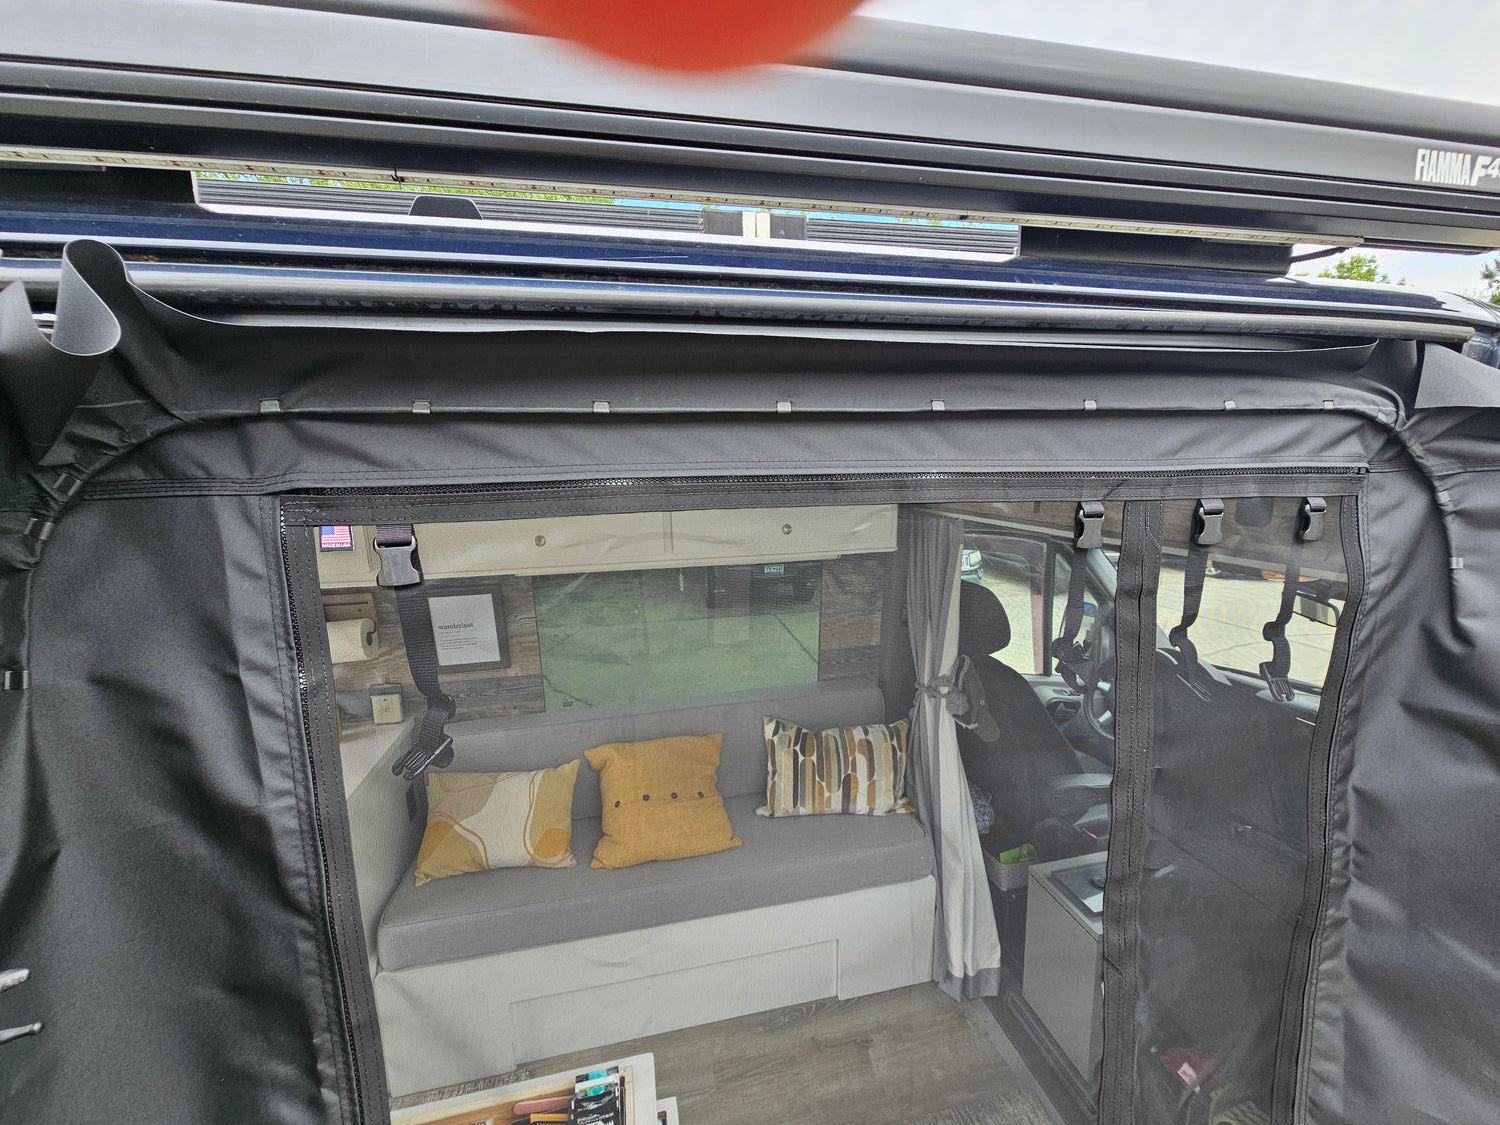
Picture shows example of a Sprinter sliding door screen. All other sliding door screens will also have clips across the top like this picture. ALSO Transit rear and Promaster rear screens will also have clips like shown. Sprinter Rear screen shown below.
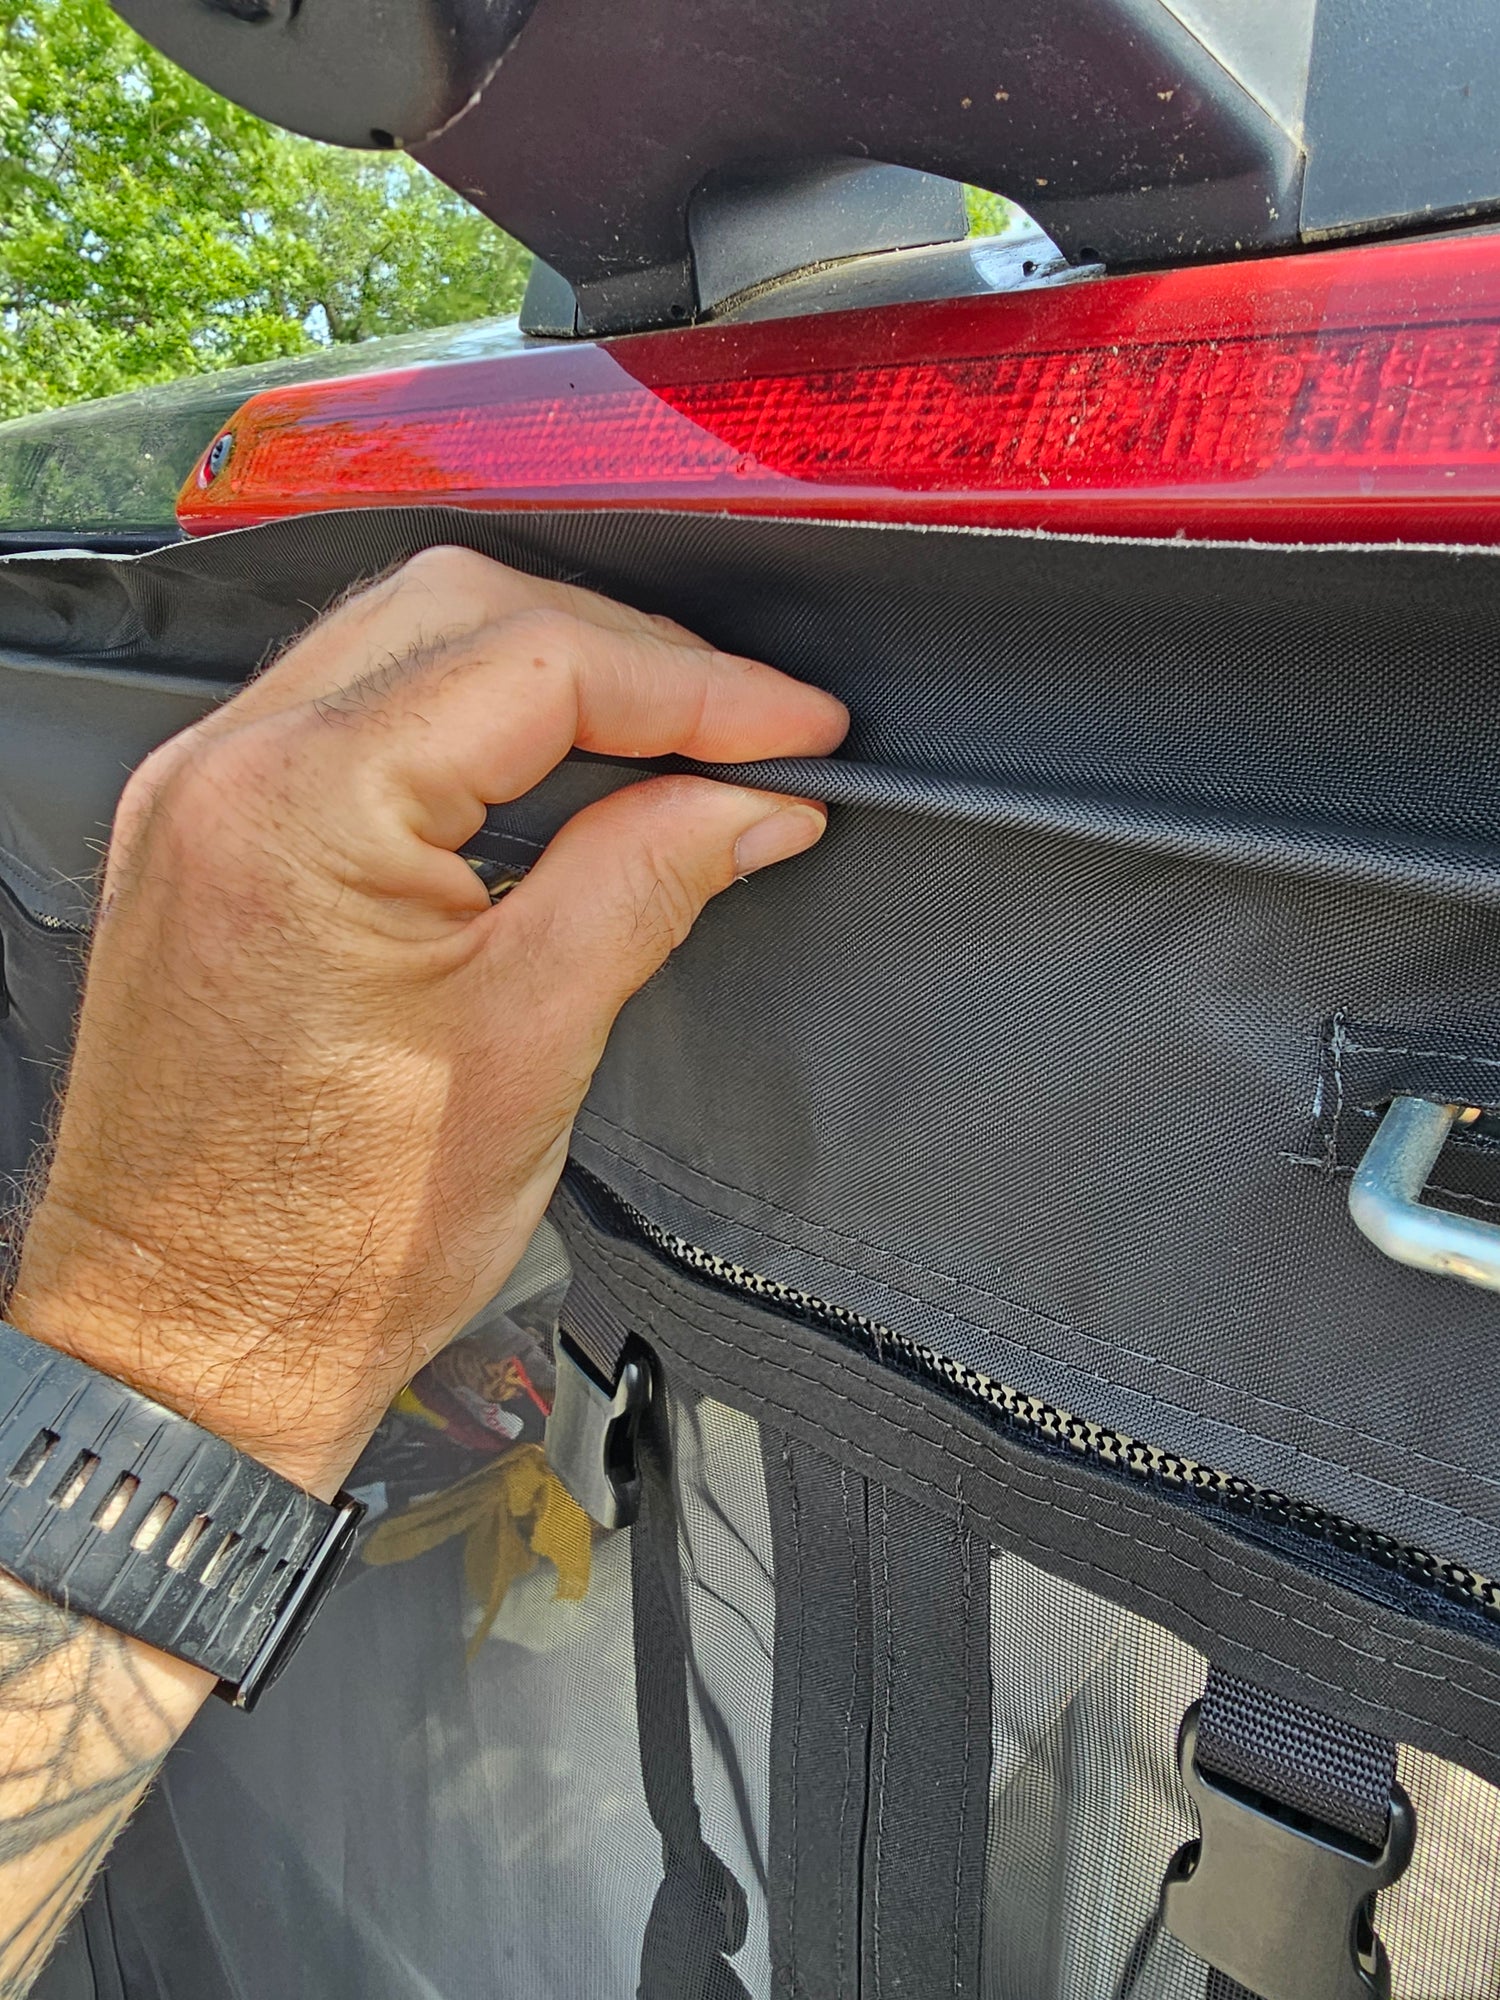
SPRINTER REAR ONLY- DO NOT INSTALL CLIPS ACROSS THE TOP- USE ONLY THE TAPE.
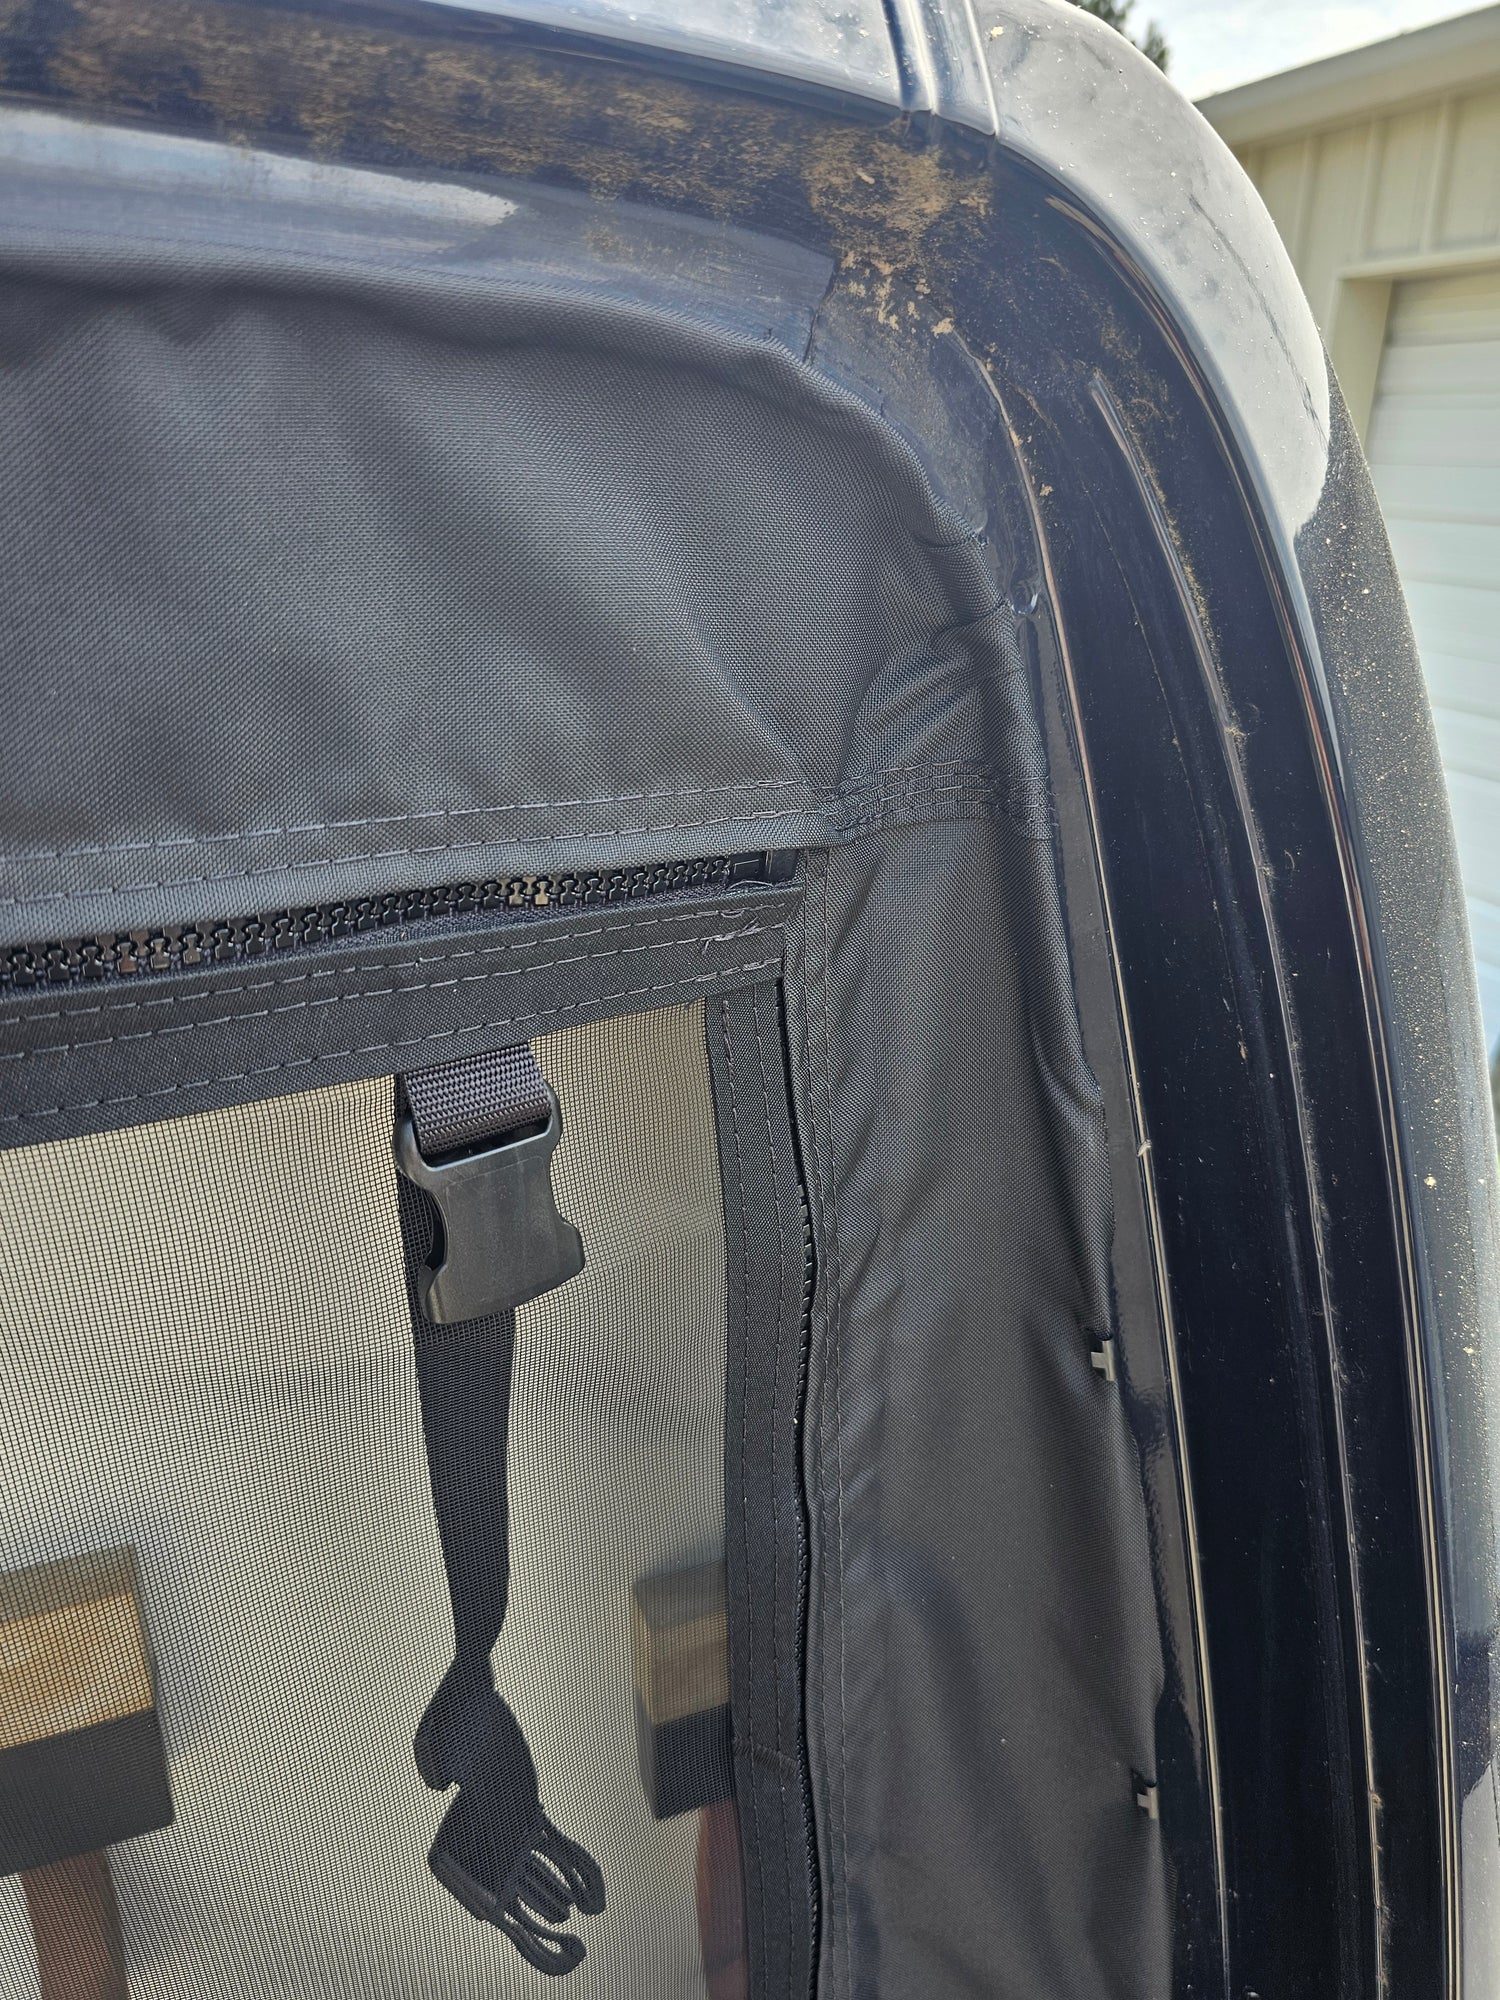
Work the position around the upper corners still only using the tape. NOTICE the first clip is below the corner on Sprinter Rear Screens
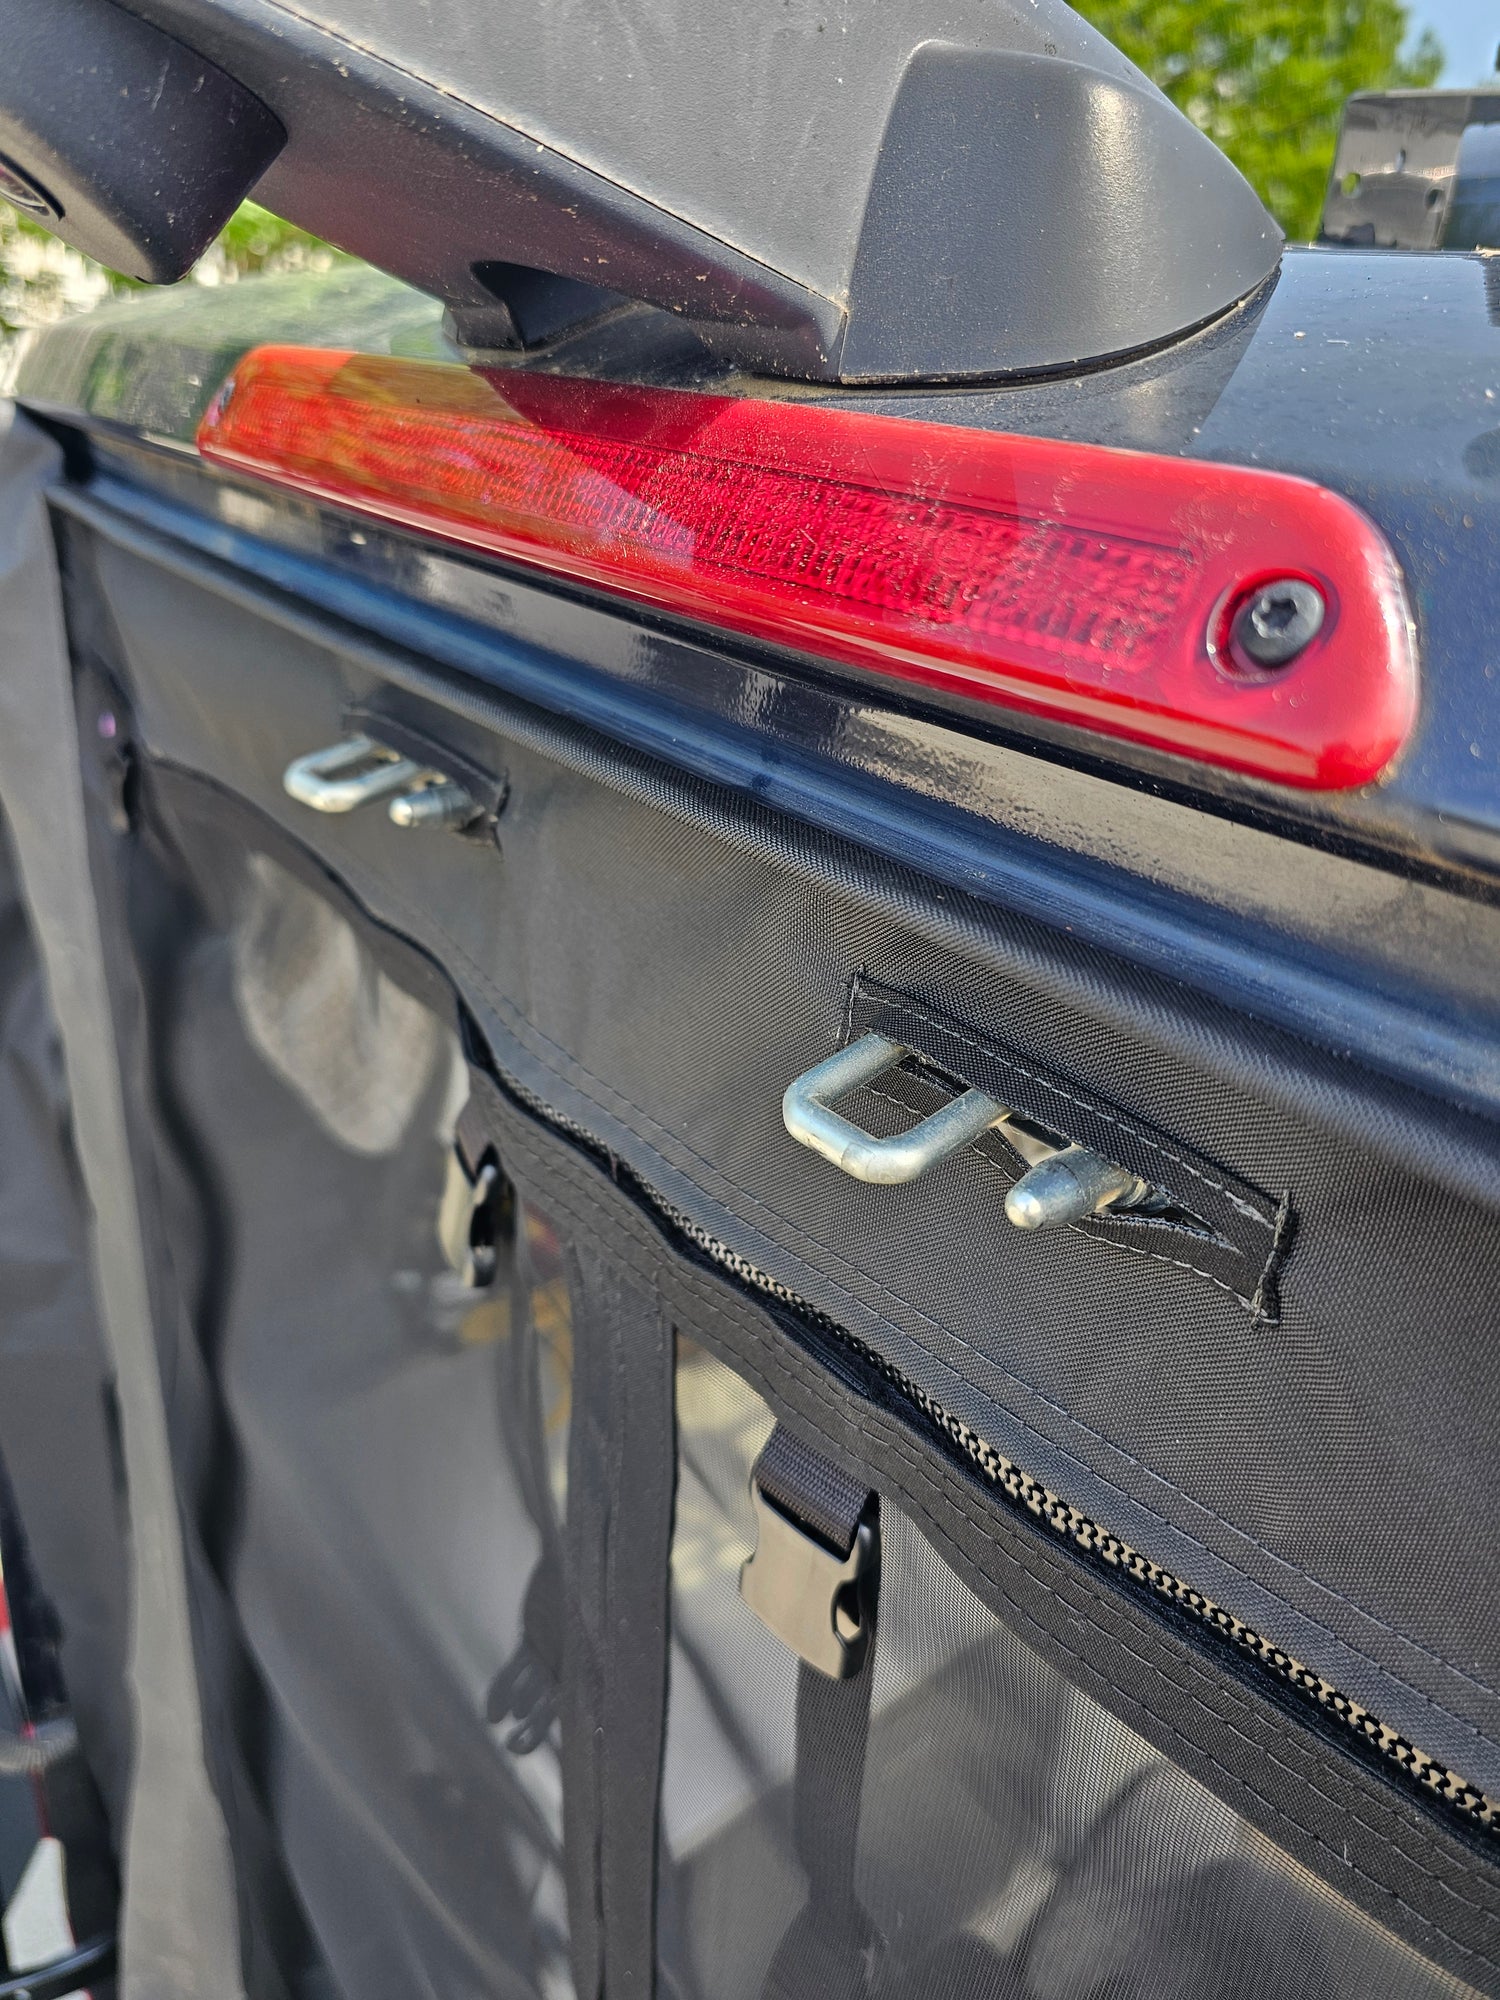
Picture shows Sprinter Rear after trimming excess material. ( Trimming is a later step once entire screen is installed into postion) NO CLIPS ACROSS THE TOP just the tape. You will use clips down the sides though. Now you can proceed with the remainder of install.
5- Work the sides
Lets work down the sides. You will wrap the fabric around the flang and install a clip. Use the clips that best fits the thickness of the metal.
The tricky areas- The left edge will have the "bump out" this area will require some finese. We find it easier to cut in some releif cuts in the material to help go around this area.
TIP- Keep an eye on the zipper so that it is coming down straight. If your working one edge you can find yourself getting a little cooked when working your sliding door screen down the edge. Same with our rear RV screens. Just step back every now and then. Take a sip and make sure your coming down the sides straight.
You can re-install the seal as you go down the sides.
IMPORTANT- TENSION- If you are installing a magnetic closing screen you will want to keep an eye on the tension. Too much side to side tension will cause the magnet strip to not operate correctly. We can adjust some at the end but do not install the screen super tight. This is less important with zipper screens.
Promaster sliding doors note- Your forward edge will have a plastic piece over the seal towards the bottom of the door. If you can remove that piece it is best but you will want to leave extra slack in the material for when you re-install. You can also just use the plastic piece to retain and hold the screen. Just loosen the 2 screws -tuck the screen behind the plastic and re-tighten the screws.
Transit Steps- The Transits will have a plastic step at the bottom that can make for a pain removing and reinstalling the seal. This is shown in the video. If you can easily remove the step that is recommended. If your step is blocked in just follow along with the video for this area.
Travatos- You will have a couple bars included in your package and instructions for install.
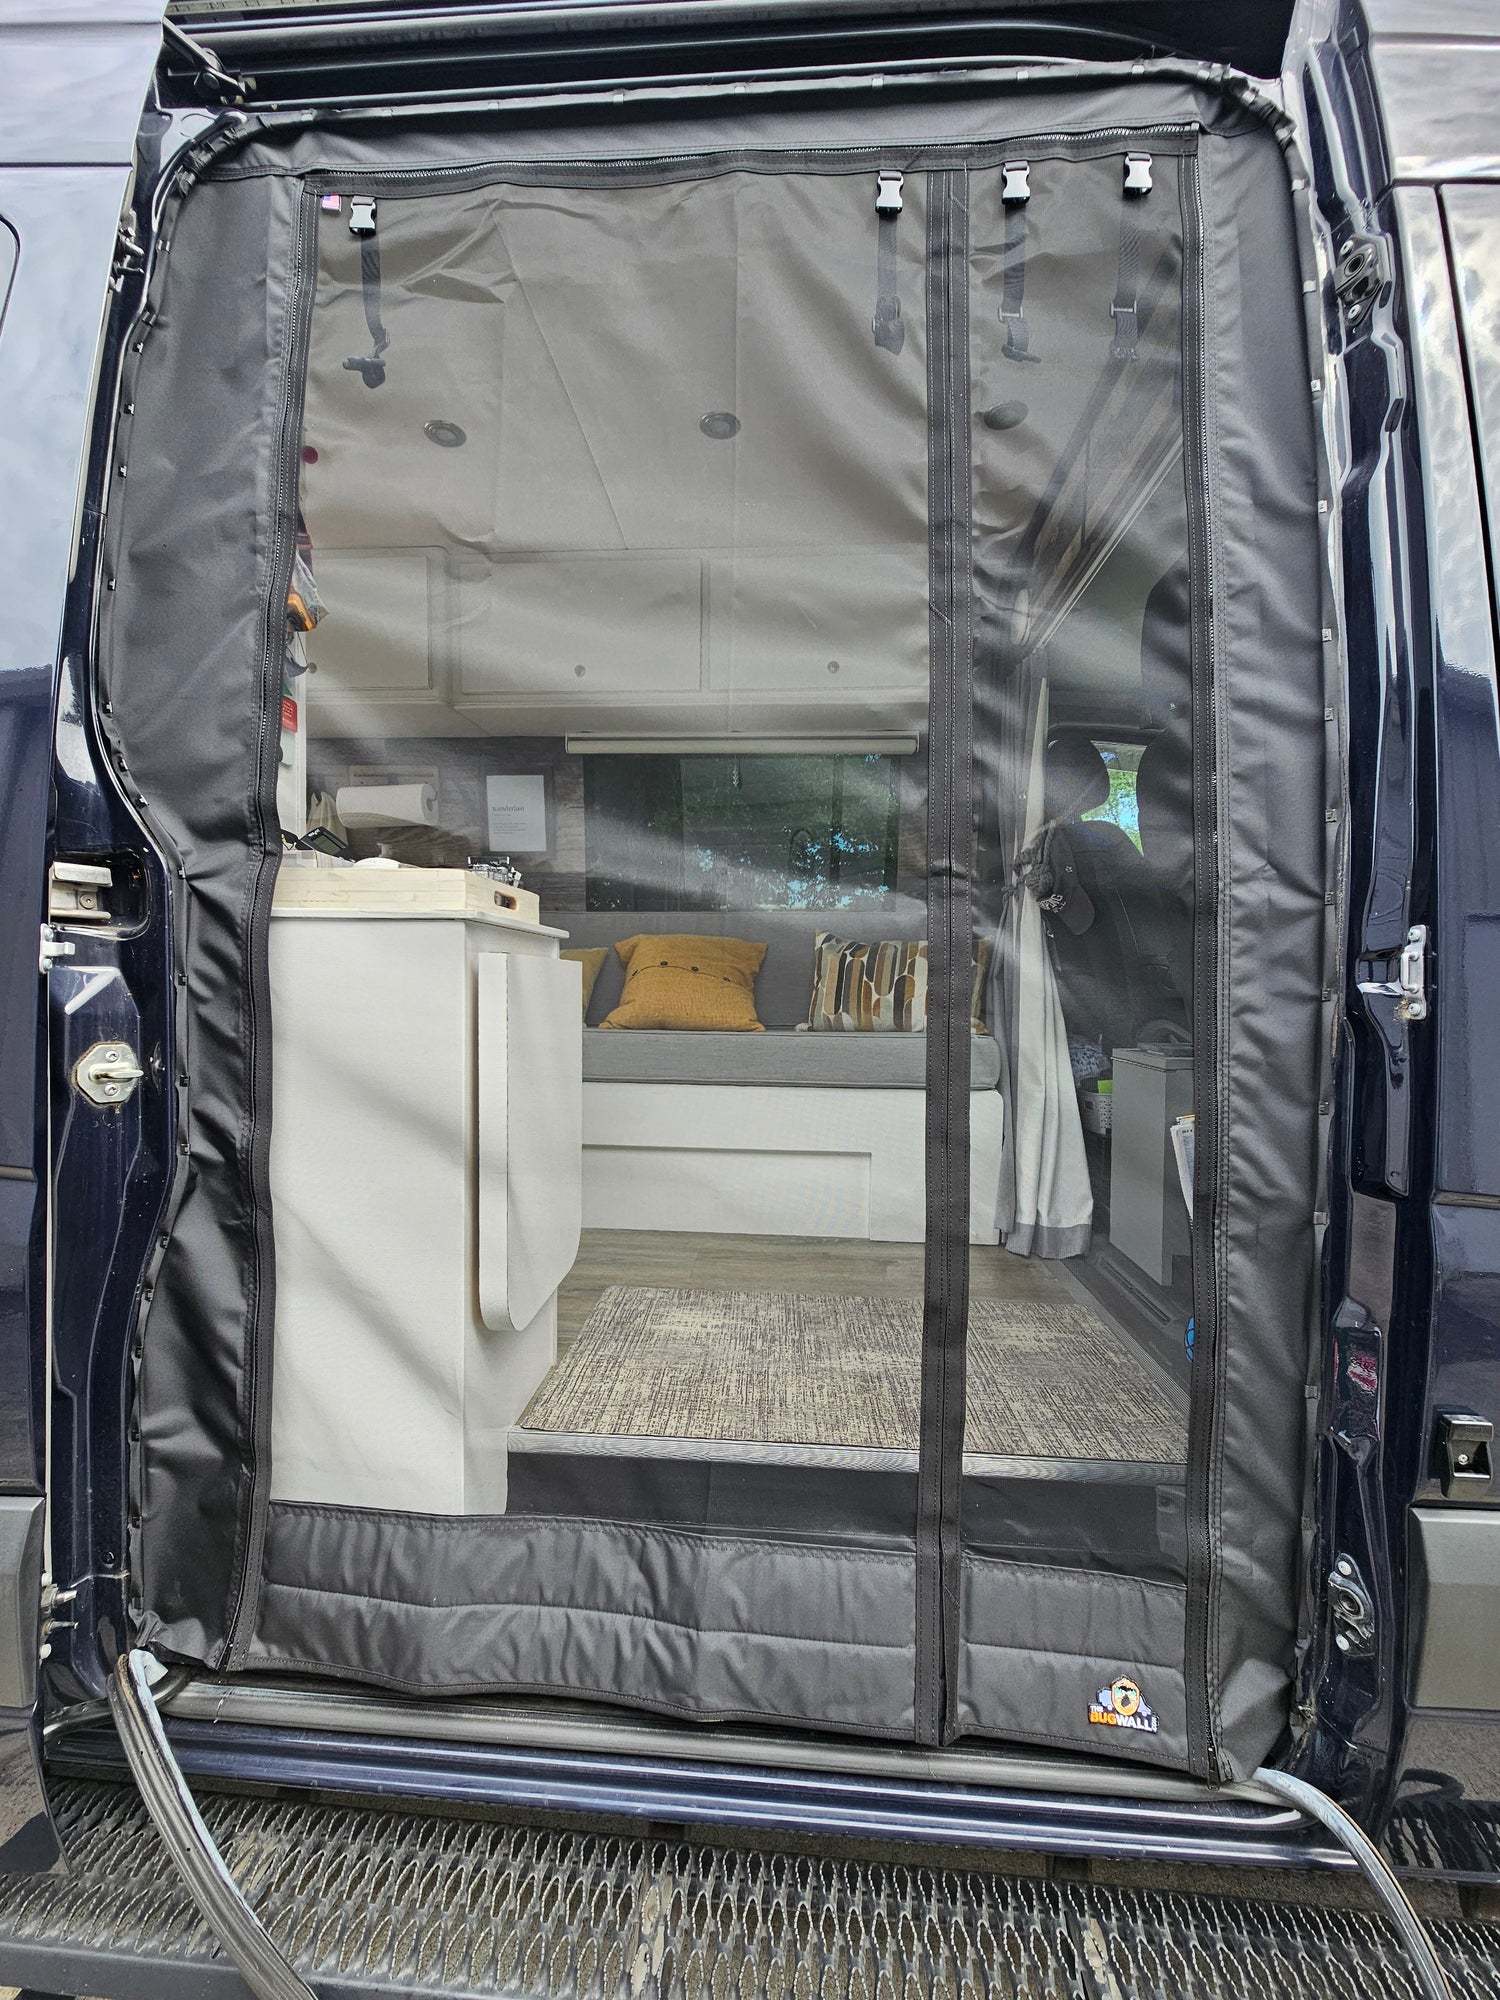
Once you work your way down both sides you will have the entire screen clipped and installed to the van. Keep an eye on tension for magnetic screens. Notice this screen is a little loose at the moment. It will tighten up slightly when we re-install the weather seal.
6- Trim and finish
Picture above shows the Bugwall after its been trimmed.
DO NOT shut the sliding door witht he excess material without trimming. There is a small chance it could get caught. If you are not confident in your placement you can trim and leave some and then trim close later. But if the door looks good its time to trim the excess material.
Once your satasfied you can start trimming off the excess material. We recommend sissors but some will choose a razor for a super tight trim. Sissors are less dangerous and also less likely to scratch your beautiful van. You can follow the video showing the trimming process.
FUN FACT- The outer edge of the Bugwall is a replaceable part :) If for some reason you mess up the trimming and need a new outer frame its ok we got ya! Its not the end of your Bugwall! Just send us an email and we will get ya fixed up!
6-TOP SEAL
Now you can re-install the seal across the top this is where the time traveling in the positioning step pays off. Go ahead..take a sip and cheers to your past self for making that reference mark on where to re-install this seal. By making that mark and you knowing exactly where to position that weather seal you now saved enough time for a ice cold sip. Refreshing.
THE PINCH- IMPORTANT- Before reinstalling the seal you must "pinch" it back shut. These seals have some metal inside of them to help hold their shape and grip. You want to pinch the seal back shut so it will have as much grip as possible once pushed on. This is shown in the video and is very important.
Using your reference mark your past self made you can reinstall your pinched shut seal across the top and around the corners. It should be snug going on.
LENGTH CHECK- Hows that length looking?
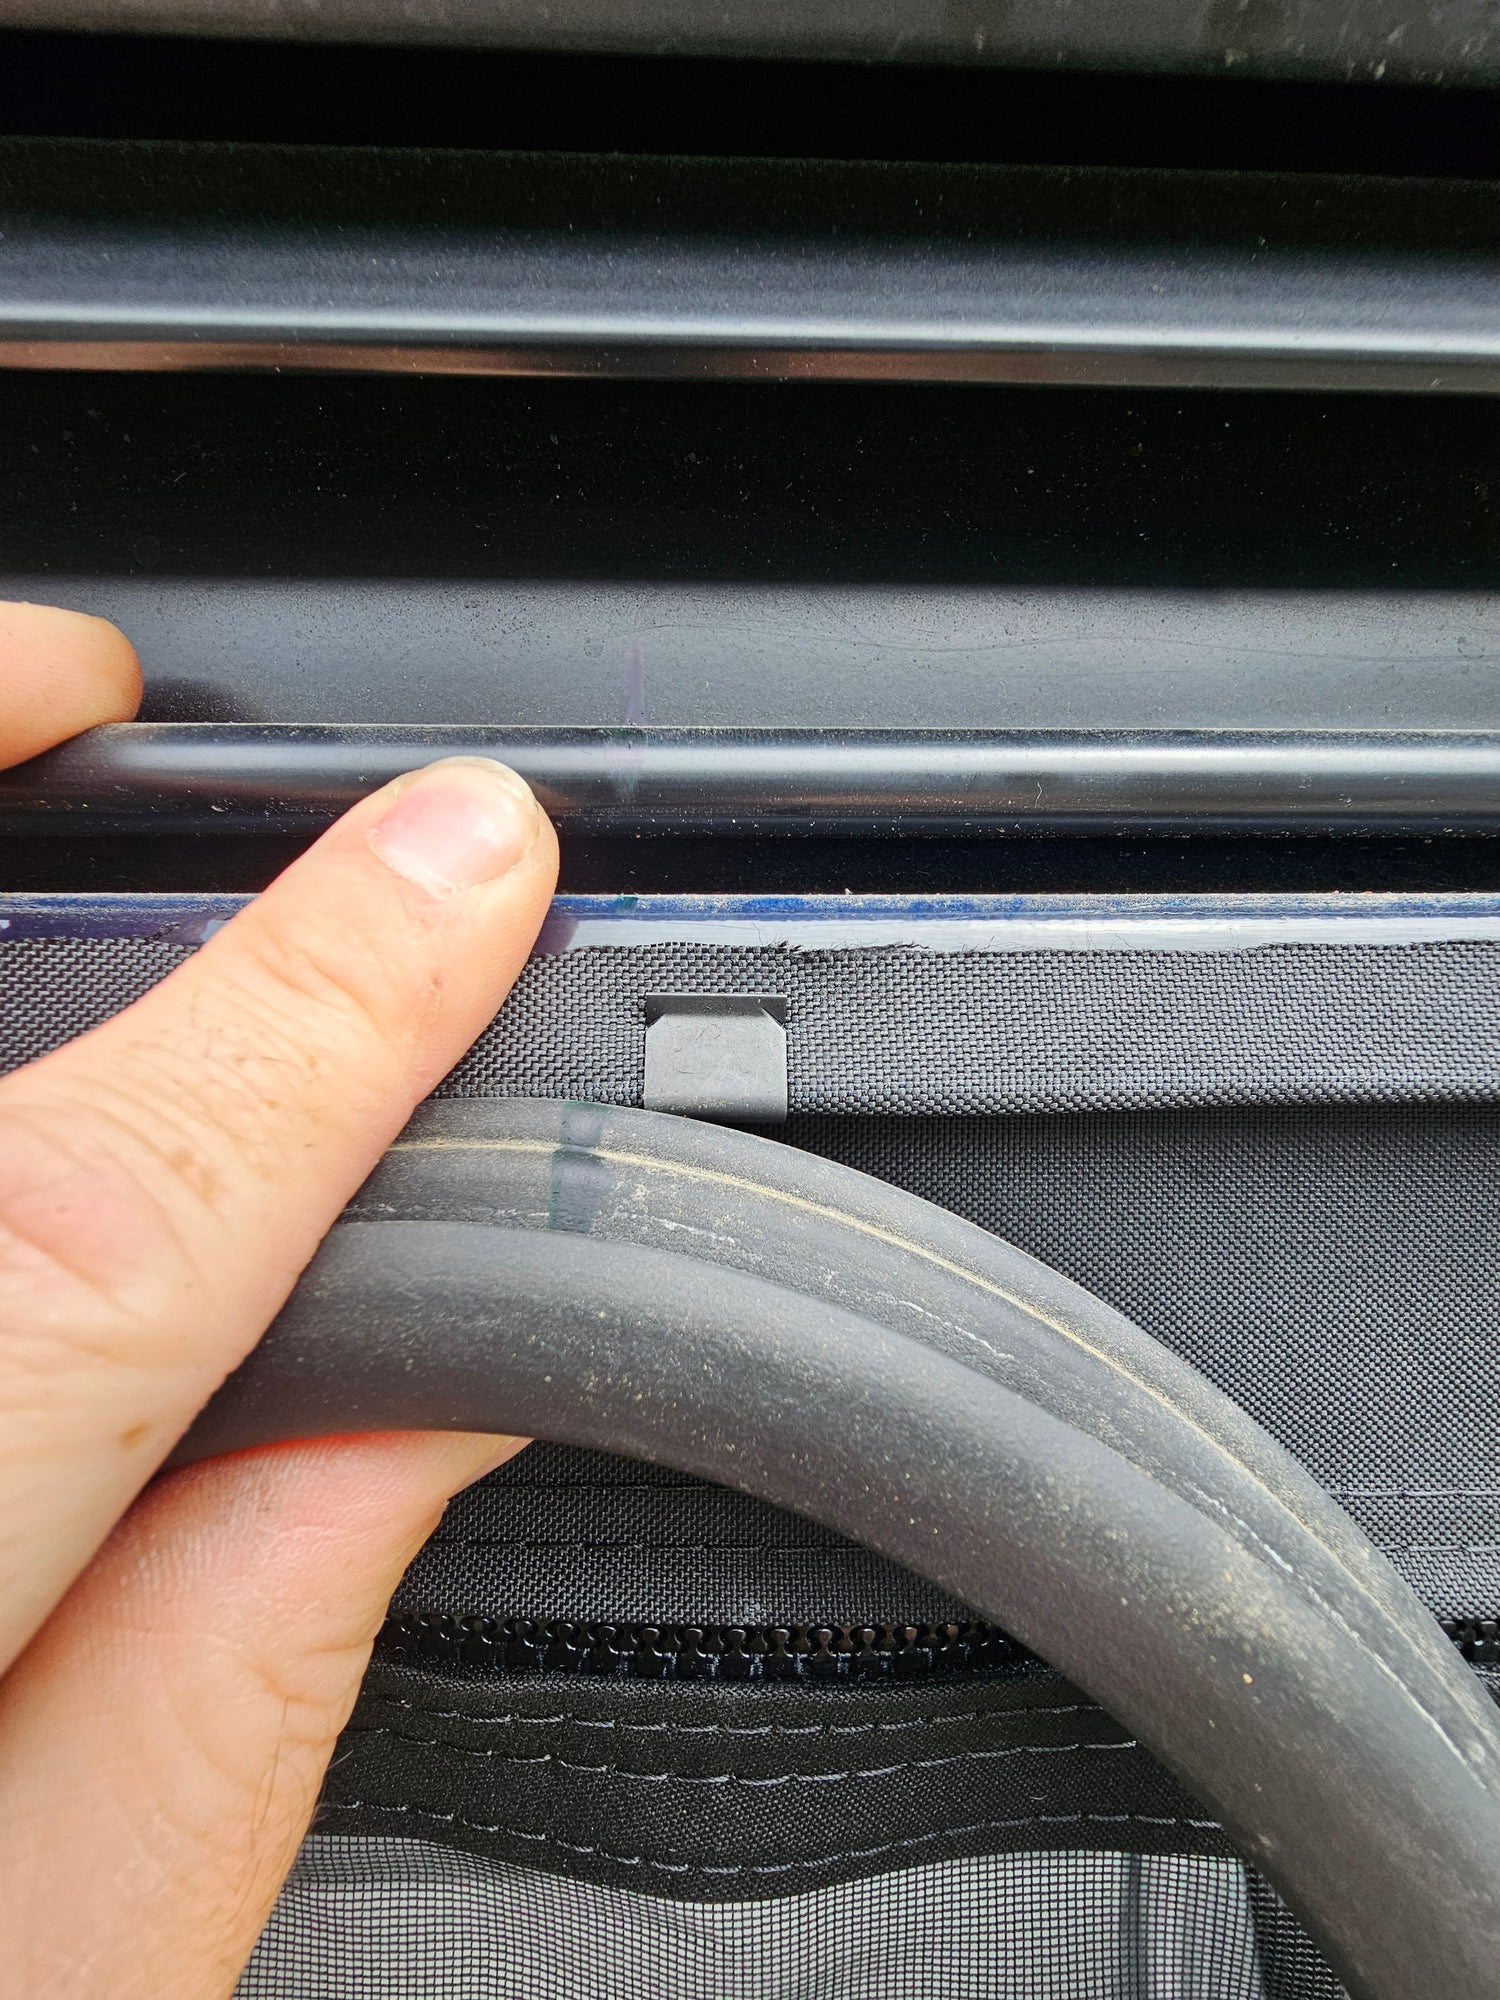
Little hard to see in the picture but the two marks line back up for re-install of the weather seal
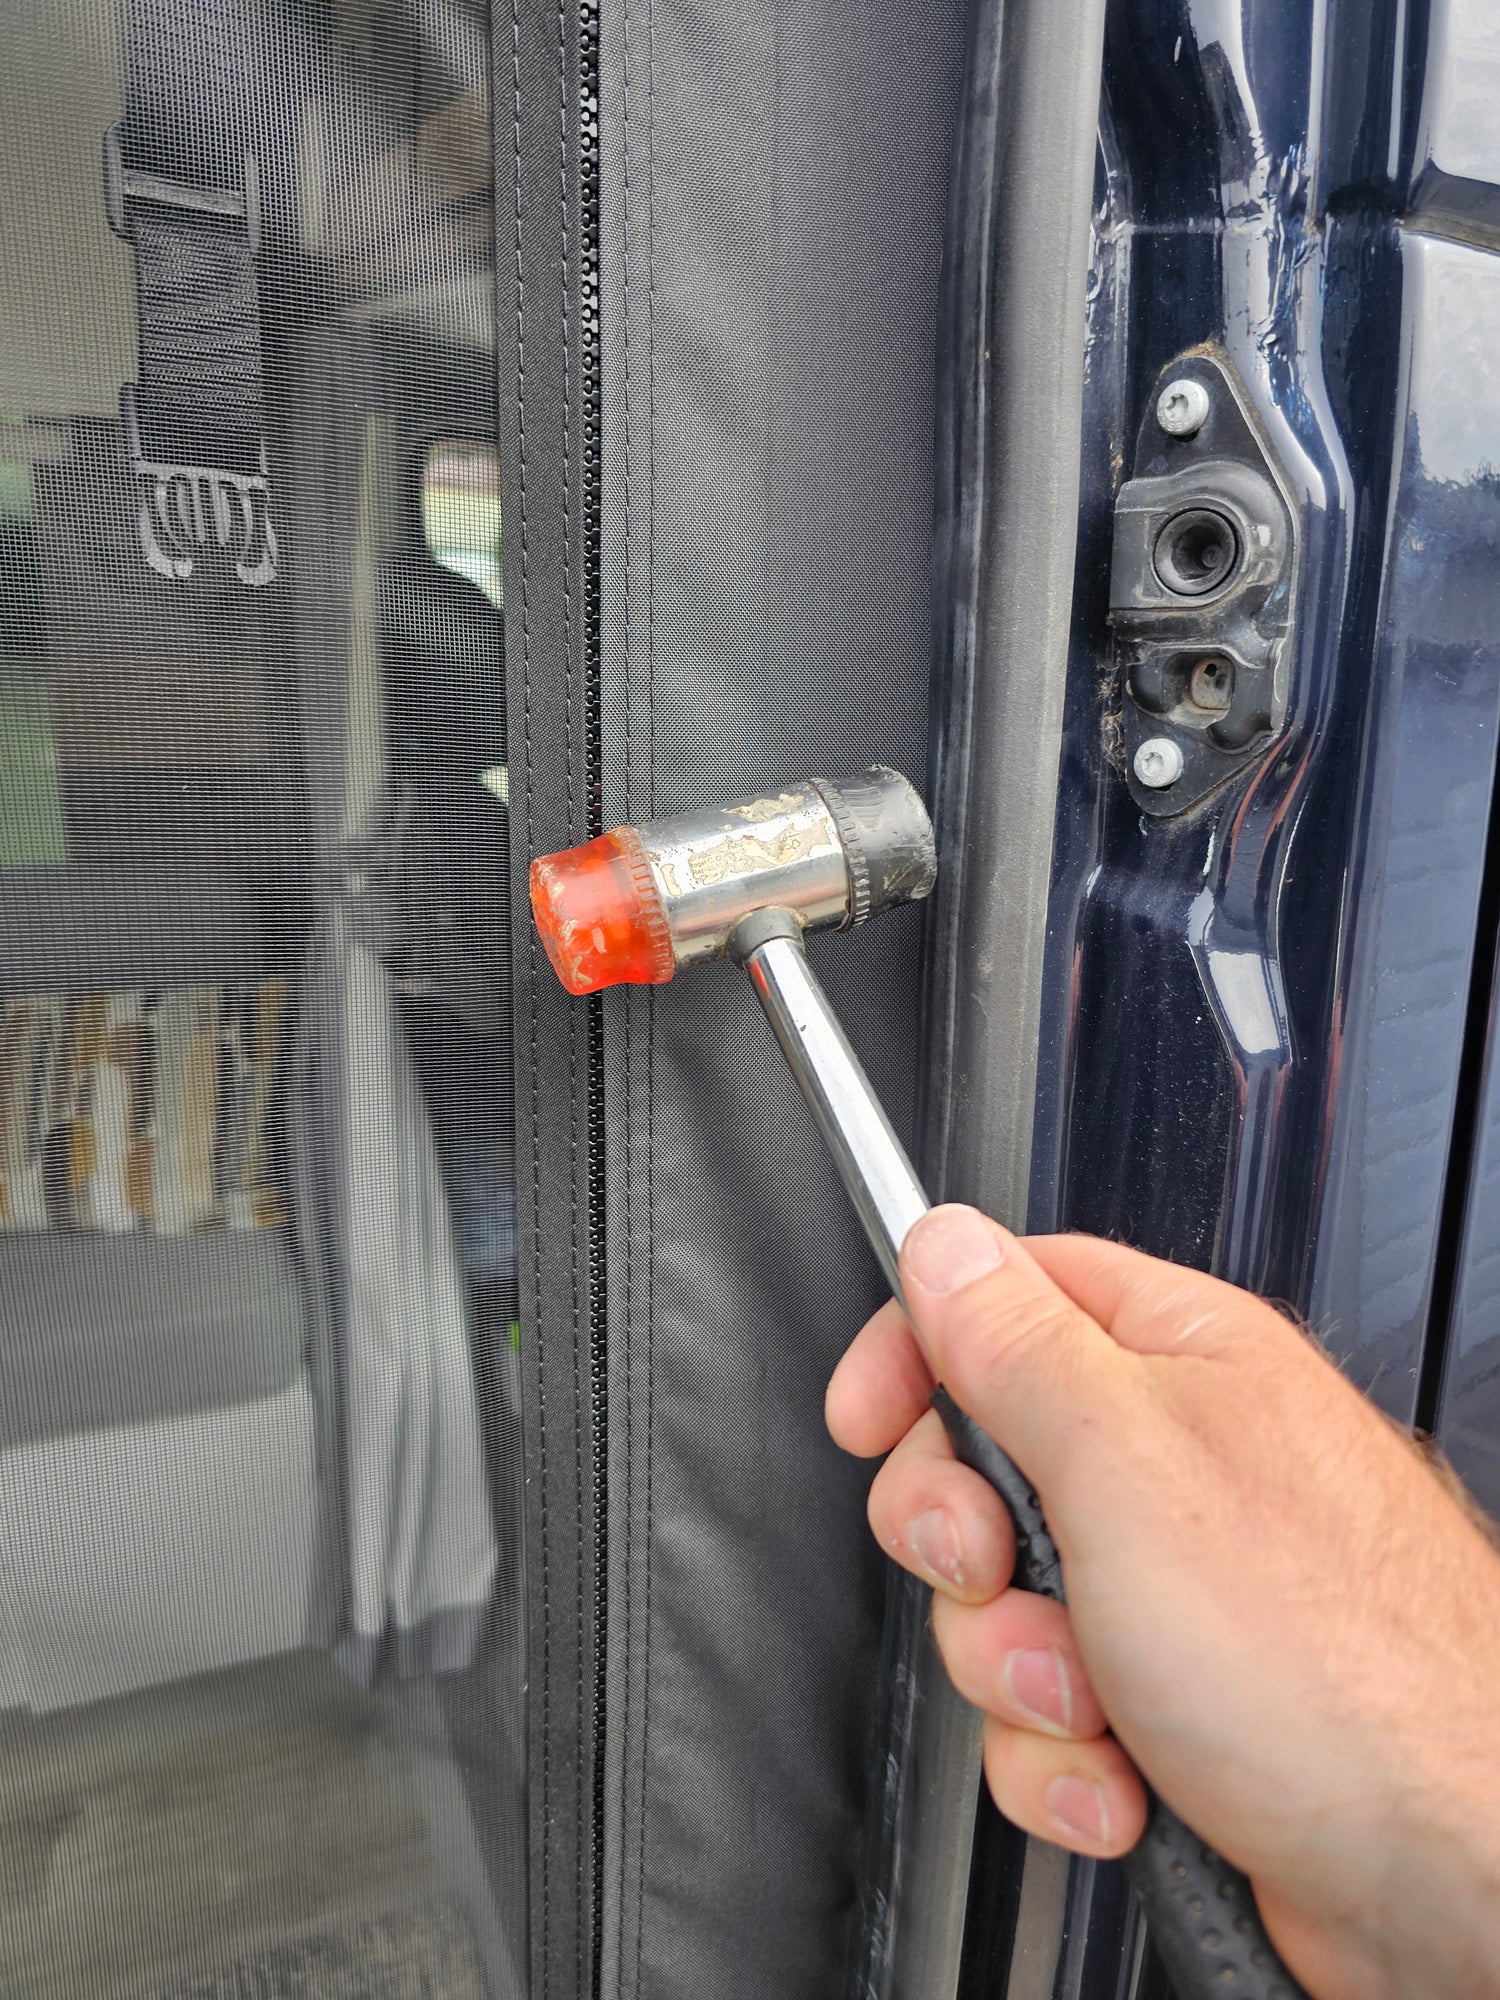
After you pinch the seal and re-install it we go back over the seal with a mallet to make sure its nice and tight everywhere. Common areas its not tight would be the corners. Make sure its fully up into the corners
8- RELOAD AND ENJOY
Reload that coozie, jump in the van out of the bug zone and into the bug-free zone. Relax and enjoy all that air flow.
Questions or problems?
If you have a question or a install problem please send us a note or give us a call. We are here to help.
Bugwall Video Instructions


